> ## Documentation Index
> Fetch the complete documentation index at: https://docs.jitra.app/llms.txt
> Use this file to discover all available pages before exploring further.
# Creating a Geofence
> Learn how to create a Geofence from the Jitra Tracking map and configure its required location fields.
Create a Geofence when a reusable place or path needs to be displayed and managed in Jitra.
## Creating the Geofence
1. Open Tracking and click Show Geofences.
2. Click the plus button.
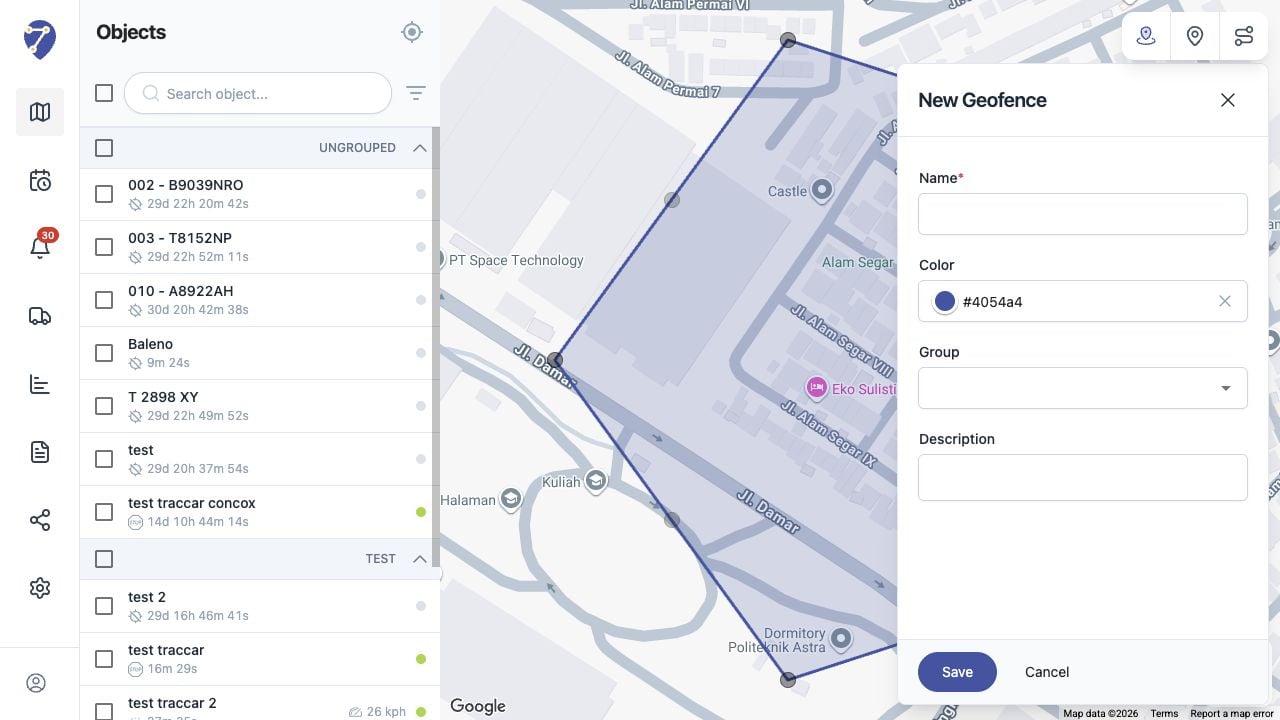
3. Click points on the map to draw the boundary, then close the polygon.
4. Enter Name and review Color, Group, and Description.
5. Click Save.
 ## Required Information
Name is required. Complete the location or shape controls shown for the Geofence, then review optional Group and Description fields.
## Reviewing the Map Preview
Confirm the preview is positioned correctly and covers the intended area or path before clicking Save.
## After Saving
The Geofence appears in the Geofences panel. Select its checkbox to display it on the map.
## Required Information
Name is required. Complete the location or shape controls shown for the Geofence, then review optional Group and Description fields.
## Reviewing the Map Preview
Confirm the preview is positioned correctly and covers the intended area or path before clicking Save.
## After Saving
The Geofence appears in the Geofences panel. Select its checkbox to display it on the map.