
- Create a Jitra account
- Verify your email address
- Create an Organization
- Complete your Organization profile
Before You Begin
Make sure you have:- A valid email address
- A reachable phone number
- Basic information about your Organization
Step 1: Create Your Account
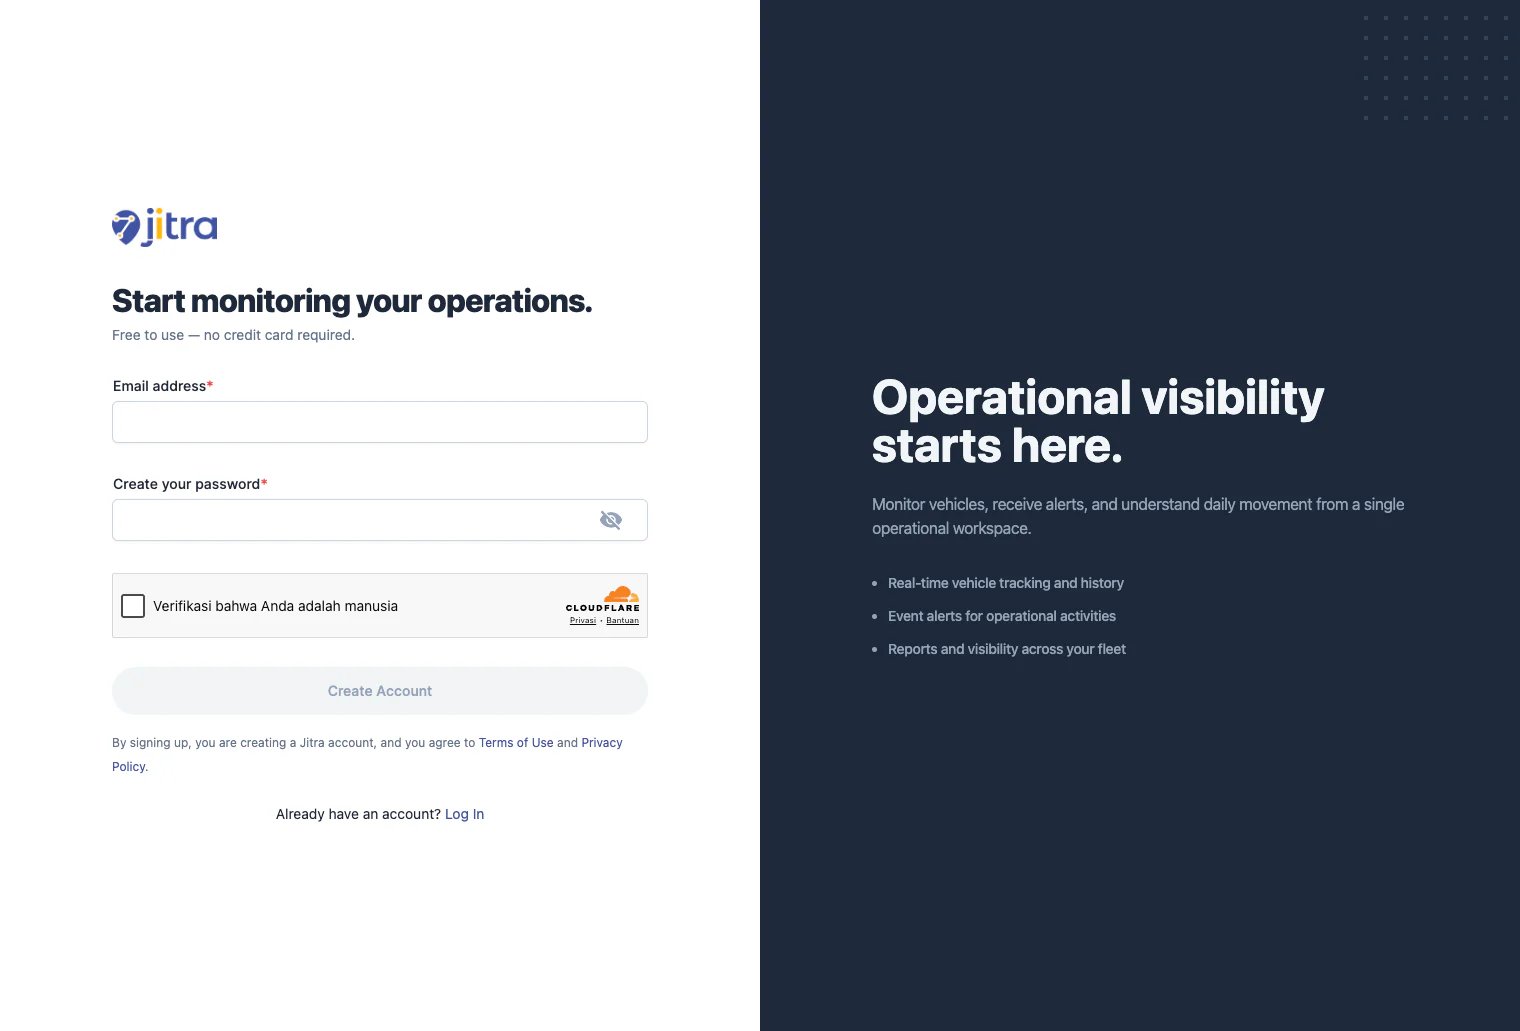
Open the Jitra registration page. Enter the following information:- Email Address
- Password
Step 2: Verify Your Email Address
After creating your account, Jitra will send a verification email to the address you registered. Open the email and click the activation link. If you cannot find the email:- Check your Spam or Junk folder
- Use the Resend Email option
- Verify that the email address was entered correctly
Step 3: Complete Basic Information
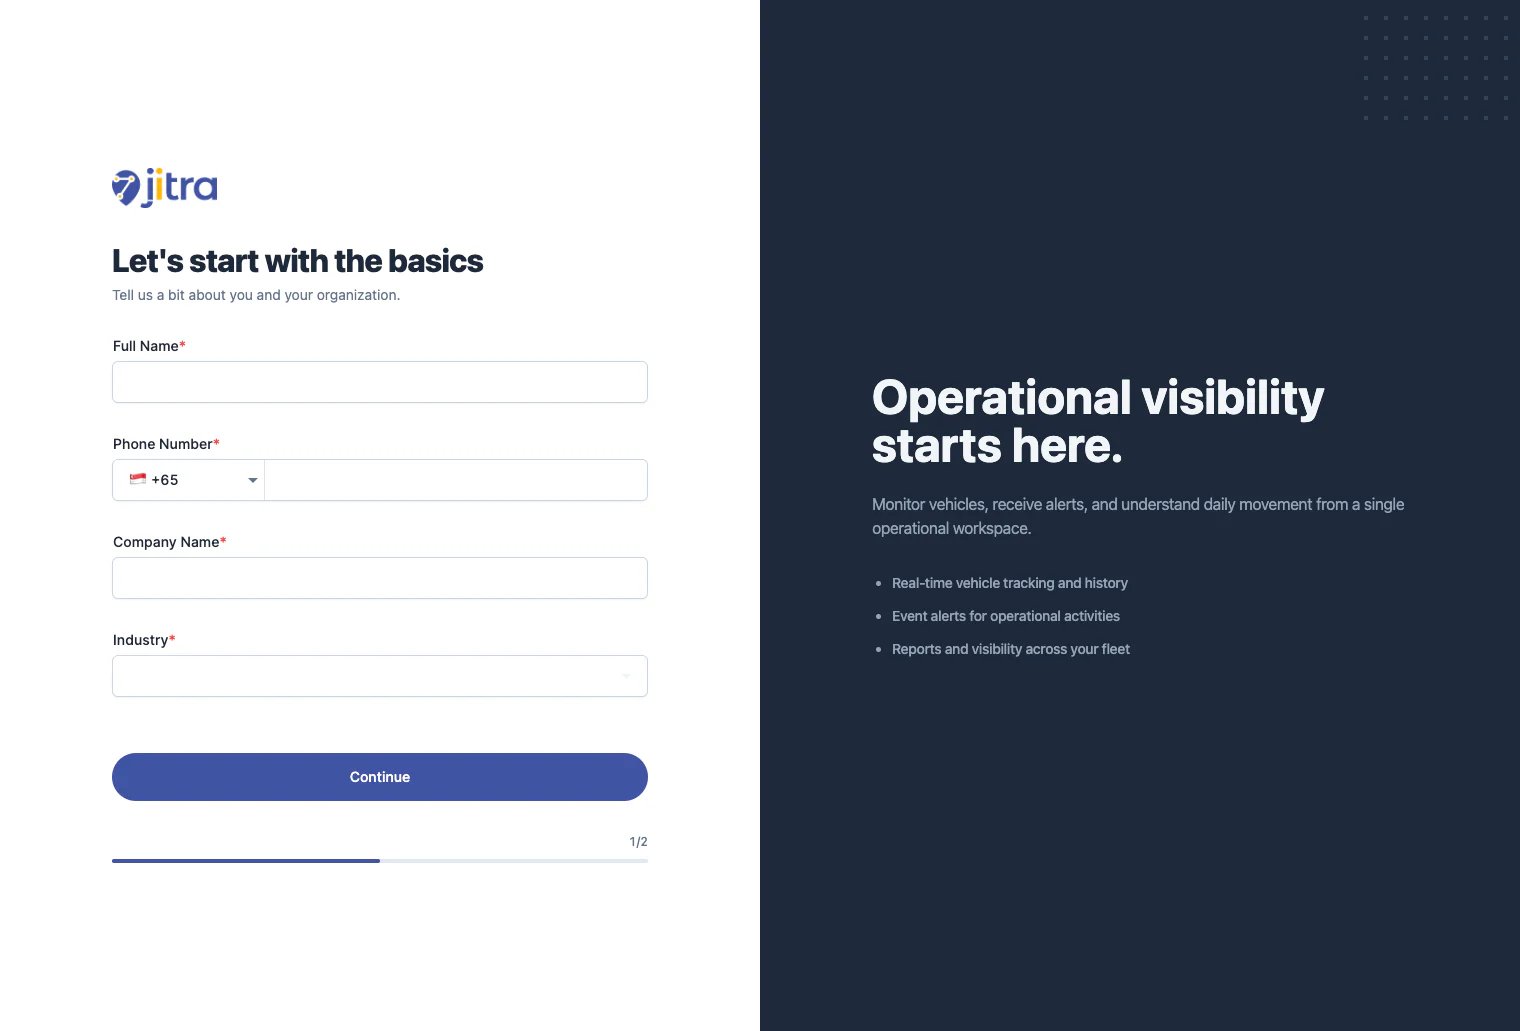
After your email address has been verified, you will be asked to provide some basic information. Required information includes:- Full Name
- Phone Number
- Company Name
- Industry
Step 4: Complete Organization Information
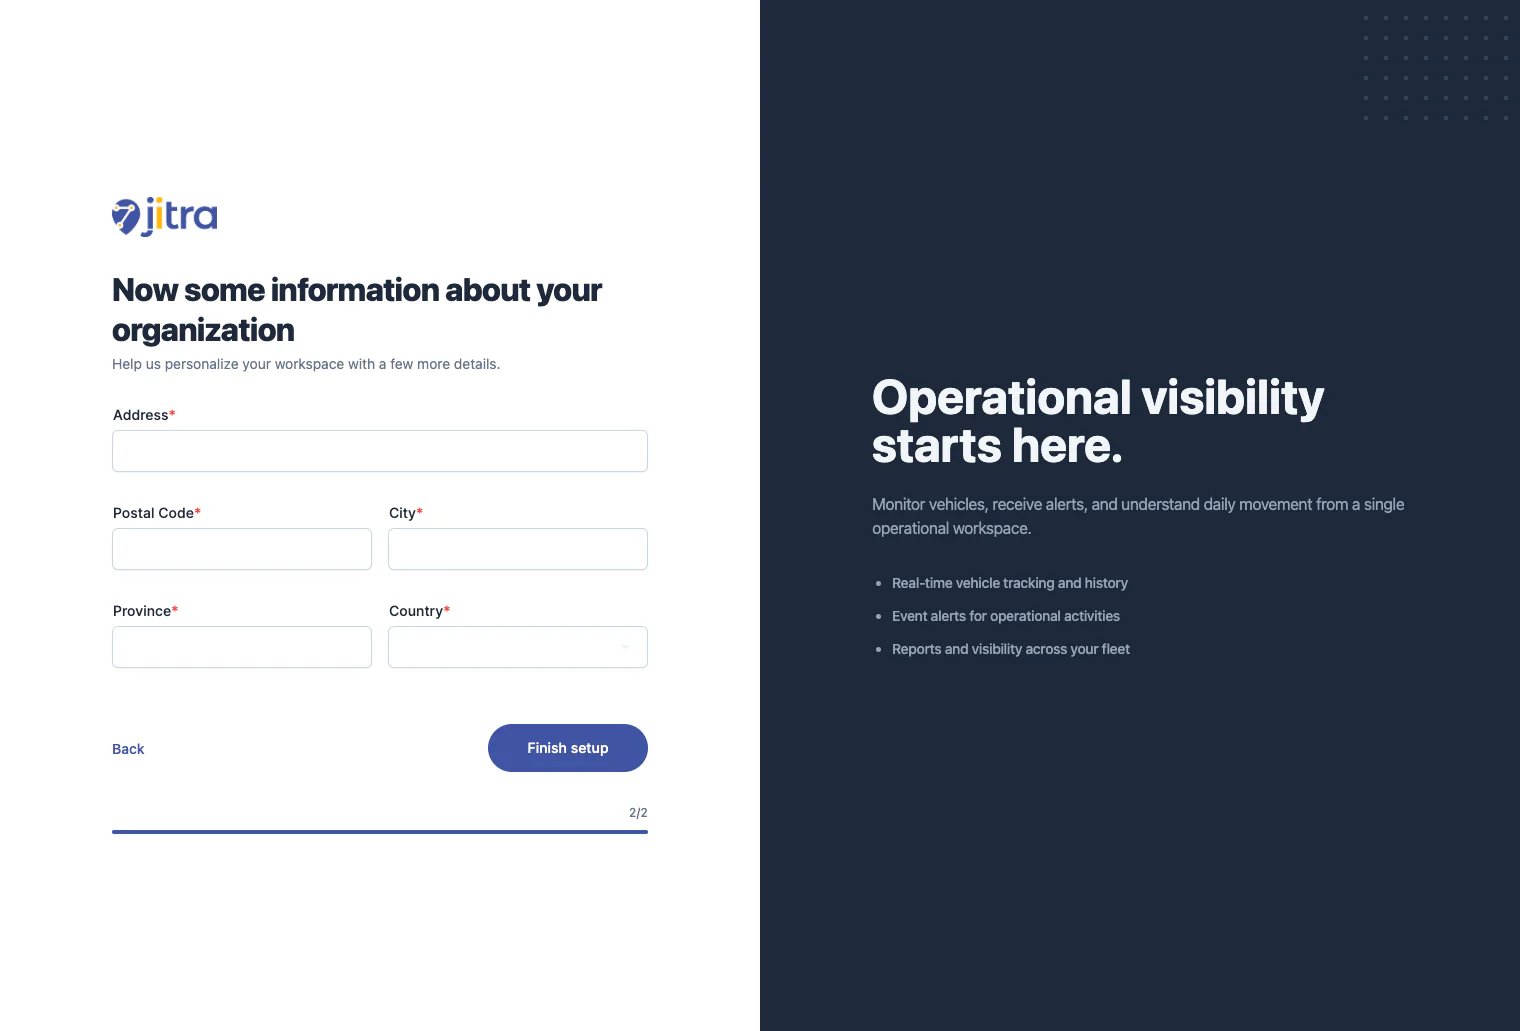
Next, provide your Organization’s address information. Required information includes:- Address
- Postal Code
- City
- Province or State
- Country
What Happens After Setup?
Once the onboarding process is completed:- An Organization is automatically created
- Your account becomes the Organization’s Super Admin
- You receive full access to Organization settings
- Your Organization starts with the Free plan
- Manage the Organization
- Add Objects
- Invite users
- Create Roles
- Configure Permissions
Understanding Organizations in Jitra
An Organization is the primary workspace in Jitra. All Objects, Events, Users, Reports, and configurations belong to an Organization. Currently:- One account can only belong to one Organization
- Each Organization has its own isolated data and configuration
Free Plan
Every new Organization automatically starts with the Free plan. The Free plan allows you to:- Use Jitra at no cost
- Add one Object
- Explore the core features of the platform